
How to Start Streaming on Twitch (2025 Guide)
The journey to becoming a Twitch streamer is a unique blend of passion, community, and entertainment. As we navigate 2025, the creator economy is more vibrant than ever, but it's also highly competitive. While the potential is immense, data reveals a harsh truth: a staggering 78.39% of new streamers quit within their first year, often due to financial instability and the immense mental toll of the grind. This guide is your definitive roadmap through this complex landscape. It's a comprehensive blueprint covering every stage of the journey, from the strategic decisions you must make before ever going live to the long-term practices for sustainable growth.
Part 1: Strategy and Planning Before You Stream
Success on Twitch is rarely an accident; it's the result of deliberate planning. This initial strategic phase is the most critical for long-term viability, where you define your purpose, identify your space in the streaming world, and build a brand that is both authentic and resilient.
Find Your Motivation
Before considering any equipment, the most important question to answer is: "Why am I doing this?" The only sustainable motivation for streaming is genuine enjoyment. If the primary goal is money or fame, the path is almost certainly destined for burnout. Viewers are incredibly adept at sensing authenticity and can tell when a streamer is truly having fun. The "grind" is real, combining the pressure to create content with financial instability, which is why your foundation must be a core passion for what you're creating.
Choose Your Niche
In 2025, a niche is no longer just the game you play; it's about who you are and the unique value you provide. With so many streamers, you must stand out. Think about combining your interests. Instead of just playing horror games, maybe you're an artist who draws the characters live on stream. This unique angle makes your content memorable and helps you build an audience on other platforms like TikTok and YouTube Shorts, which is crucial for growth.

Create Your Brand Identity
Your brand is the cohesive identity that ties your content together. Start with a name that is memorable, easy to spell, and available across all major social media platforms. Beyond the name, your channel needs a distinct vibe, the visual and tonal language of your stream. You can use platforms like Pinterest for inspiration to develop a theme. This theme should inform everything from your on-screen overlays to your emotes. Most importantly, this brand must be a genuine extension of your personality.
Part 2: Your Streaming PC
The foundation of your stream is a PC that can handle gaming and broadcasting simultaneously. This is about balancing raw gaming power with efficient video encoding. An underpowered system can lead to dropped frames and a frustrating experience for you and your audience.
Core PC Components for Streaming

Tiered PC Build Recommendations
Choosing components can be daunting. This table, with insights from sources like PC Gamer and Tom's Hardware, provides three balanced build guides for different budgets.
| Component | Budget Build (Approx. $850) | Mid-Range Powerhouse (Approx. $1,500) | Pro-Level Rig (Approx. $2,000+) |
|---|---|---|---|
| CPU | Intel Core i3-14100F | AMD Ryzen 5 7600X / 9600X | AMD Ryzen 7 7800X3D / 9800X3D |
| GPU | NVIDIA GeForce RTX 4060 | NVIDIA GeForce RTX 4060 Ti 16GB | NVIDIA GeForce RTX 4080 Super / 5070 Ti |
| RAM | 16 GB DDR4 3200MHz | 32 GB DDR5 5200MHz+ | 32 GB DDR5 6000MHz+ |
| Storage | 1 TB PCIe 3.0 NVMe SSD | 1 TB PCIe 4.0 NVMe SSD | 2 TB PCIe 4.0 NVMe SSD |
| PSU | 650W 80+ Bronze | 750W 80+ Gold | 850W+ 80+ Gold/Platinum |
Note: Prices are estimates and will vary. The RTX 40-series is chosen across all tiers for its superior NVENC encoder, which is critical for offloading stream processing.
Part 3: Essential Streaming Gear
While the PC is the engine, your peripheral gear creates the professional broadcast. The guiding principle is simple but crucial: audio is king. Viewers will tolerate imperfect video but not poor, unclear audio.
Why Audio is Your Top Priority
Your voice is your primary tool for connecting with your audience. A clear, crisp microphone is the single most important piece of gear you will buy. USB microphones are the plug-and-play standard for most streamers and offer excellent quality for the price.

Choosing a Webcam
A clear webcam image helps build a stronger connection with your audience. The sweet spot for streaming is 1080p resolution at 60 frames per second (FPS), as it provides fluid motion that looks great for reactions. Remember, even a budget-friendly webcam can produce a fantastic image when paired with good lighting.
How to Light Your Stream
Good lighting is the secret to making any webcam look professional. It eliminates grainy video and creates a flattering image. The professional standard is the three-point lighting system:
- Key Light: Your main, brightest light, placed in front of you and slightly to one side.
- Fill Light: A softer light on the opposite side to "fill in" shadows from the key light.
- Back Light: Placed behind you to create a subtle rim of light that separates you from the background.

Part 4: Broadcasting Software and Graphics
With your hardware ready, it's time to set up your digital command center. This involves choosing your broadcasting software and designing the on-screen visuals that define your channel's brand.
Choosing Your Broadcasting Software
The choice for most PC streamers comes down to two contenders: OBS Studio and Streamlabs Desktop. Streamlabs is built on OBS's core engine but packages it into a more user-friendly application. While these are the most popular, other alternatives like XSplit also exist.
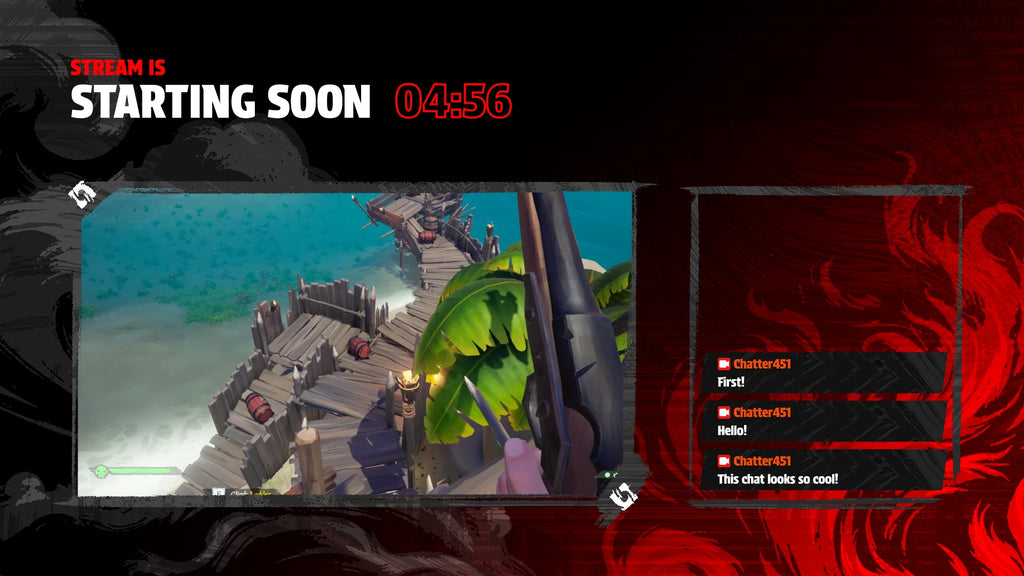
Designing Your On-Screen Look
A cohesive set of on-screen graphics is essential for establishing a professional brand. A complete stream package typically includes overlays, alerts for new followers, and scenes like "Starting Soon" and "Be Right Back." Investing in a professional design from day one helps your channel stand out and look credible.
Get a Professional Look Instantly

Want to skip the design hassle and get a stunning, professional look right now? Our complete stream overlay packages include everything you need to build your brand, from animated scenes and alerts to webcam frames and Twitch panels. They are easy to set up in OBS and Streamlabs so you can focus on creating content.
Part 5: Going Live for the First Time
With your setup complete, the moment arrives. This phase is about establishing routines and technical best practices to ensure a smooth stream every time, freeing you up to focus on creating entertaining content.
Your Pre-Stream Checklist
A consistent pre-stream checklist turns a chaotic process into a simple routine, reducing technical errors and anxiety.
- 60 Mins Before: Tidy your background and mute your phone.
- 30 Mins Before: Close unnecessary apps, launch your game, and open your broadcast software.
- 15 Mins Before: Go to your Twitch Dashboard, set your stream category, and write a compelling title.
- 5 Mins Before: Switch to your "Starting Soon" scene, start your intro music, and take a few deep breaths.
Optimizing Your Stream Settings
Your goal is to find the perfect balance between visual quality and the limitations of your PC and internet. It is always better to have a stable 720p stream than a laggy 1080p stream. For a 1080p/60fps broadcast, a bitrate between 4,500 and 6,000 kbps is recommended. Always use a wired Ethernet connection and set your Rate Control in your software to CBR (Constant Bitrate) for maximum stability. A critical technical detail for new streamers is transcoding: the ability for viewers to select a lower quality option. Twitch does not guarantee transcoding for new channels, so if you stream at a high bitrate, viewers with slower internet may be unable to watch.
How to Talk to an Empty Chat
The most daunting challenge for new streamers is filling the silence. A potential viewer who finds silent gameplay is likely to leave in seconds. The most important tip from veteran streamers is to hide your viewer count. Turn it off and stream as if you have an engaged audience. Narrate your gameplay: talk about what you're doing, why you're doing it, and what you think will happen next.
Part 6: Building a Community
A successful channel is measured by the strength of its community. This transformation from passive viewers to active members is the result of intentional effort in engagement and moderation.

Moderation and Handling Trolls
A thriving community can only exist in a safe environment. Establish clear rules for your channel from day one. Use a chatbot like Fossabot or Nightbot for automated filtering. The cardinal rule for dealing with trolls is: do not feed them. Giving them attention only encourages them. Rely on your moderators for a quiet timeout or an immediate, silent ban for hateful behavior.
Part 7: How to Make Money Streaming
While passion is the driving force, monetization turns a hobby into a sustainable career. It's crucial to approach this with a realistic mindset, as significant income is a result of an established community.
Achieving Twitch Affiliate Status
The Twitch Affiliate Program is the first major step. The requirements are designed to show you've built a small but consistent foundation.
Becoming an Affiliate unlocks Subscriptions (typically a 50/50 revenue split with Twitch), Bits, Ad Revenue, Channel Points, and custom Emotes.
The Path to Twitch Partner
The Twitch Partner Program is for established streamers with a substantial community. While the application requires an average of 75 concurrent viewers, acceptance is a manual review process. Partnership offers benefits like better revenue splits, more emote slots, and priority support.
Part 8: Building a Sustainable Career
Achieving Affiliate or Partner status is a milestone, not an endpoint. The final challenge is maintaining momentum, adapting to change, and protecting your well-being.
How to Avoid Streamer Burnout
Burnout is a serious issue driven by financial instability, competition, and an "always-on" culture. Recognizing symptoms like chronic fatigue, irritability, and a loss of enjoyment is critical. Prevention strategies include setting realistic goals, taking regular breaks, diversifying your content, and prioritizing self-care.

Understanding Twitch Rules and DMCA
Protecting your channel is essential. Familiarize yourself with Twitch's Community Guidelines, which prohibit hateful conduct and harassment. Crucially, understand the DMCA (Digital Millennium Copyright Act). Using copyrighted music you don't have a license for can result in a copyright strike. Twitch operates on a three-strikes policy, which can lead to permanent account termination.
Conclusion: Your Streaming Adventure Awaits
Embarking on a journey to become a Twitch streamer is an exciting endeavor. Success requires a blend of strategic planning, technical knowledge, and a dedication to community building. The path begins with authenticity—finding a niche you are passionate about and building a brand that is a true reflection of yourself. The road will have challenges, but by focusing on the fundamentals outlined here, you are equipping yourself not just to start, but to thrive.
Day One Checklist
- Define your "Why" for streaming.
- Pick a starting niche and unique angle.
- Secure your brand name on all platforms.
- Get your essential gear, prioritizing audio.
- Choose and set up your broadcast software.
- Create a Discord server for your community.
- Run a test stream to check your quality.
- Hide your viewer count before you go live.
- Press "Go Live" and remember to have fun!