
How to Setup a Ticket Bot in Discord
One of the best ways to help answer questions and assist your server members is by using a ticket support bot. In this tutorial, we'll show you everything you need to know to quickly set up the Tickets support bot. Visit the official Tickets bot website to get started.

Invite the Bot
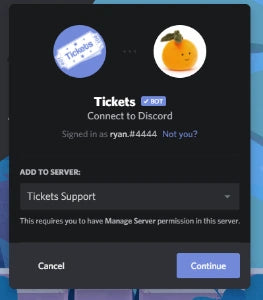
First, you'll need to invite the bot to your server. On the Tickets homepage, you'll see a button that says "Invite Tickets to your server". Click the button and complete the steps on Discord to add the bot to your desired Discord server. You must have the "Manage Server" permission to do this.
Basic Tickets Setup
Now that you've added the bot to your server, let's configure some basic settings.
Language
Choose the preferred language of the Tickets bot. The bot supports over 20 languages. Use the /language command to select a language. You'll need to provide a country code after you've seen the language list. For example, /language en will set the bot language to English.
Designate Owner
Tickets supports slash commands, meaning that you can simply hit / in your Discord client to have commands auto-completed with the correct arguments. If you're not the owner of your Discord server, you can ask the owner of your server to designate you as an admin of the Tickets bot. They'll need to use the command /addadmin @YourUsername in a channel the bot can see.
Web Dashboard Setup
Tickets has its own web dashboard that makes configuring the bot much easier than having to rely on commands within Discord. The web dashboard for the Tickets bot is located at dashboard.ticketsbot.net.
Once you visit the dashboard, you'll be asked to log in with Discord. A list of servers that you've invited the bot to should now appear. Select the server to start customizing the bot.
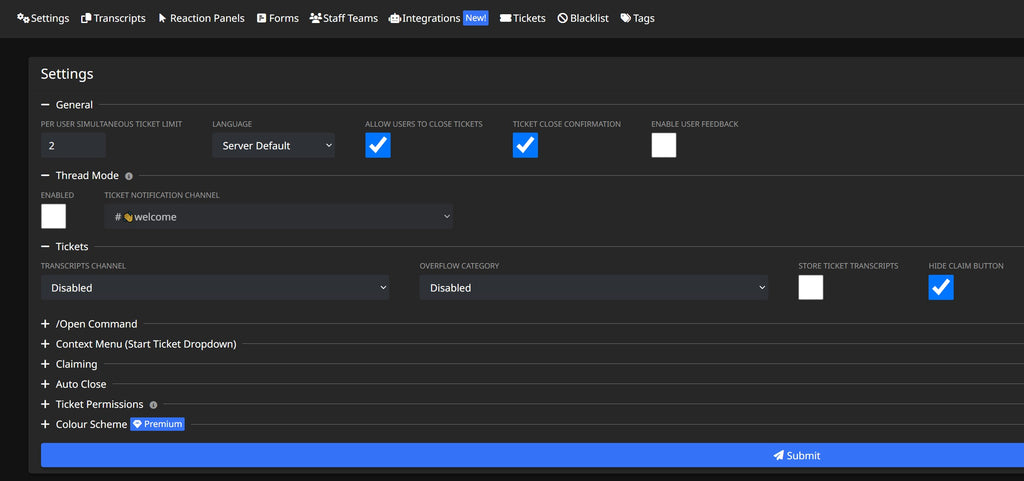
General

- Per user simultaneous ticket limit: How many tickets one user can have open at the same time.
- Language: The language of the bot.
- Allow users to close tickets: Enable this if you want users to be able to close their own tickets without you or your staff.
- Ticket close confirmation: Adds an extra confirmation to click before a ticket is closed.
- Enable user feedback: Allow your server members to give feedback for your ticket support.
Thread Mode

This is a new option for the bot that shifts the way tickets work. Instead of the entire support team being included in a ticket from the start, the thread begins with no staff members. Then, a button is sent to your ticket notification channel for staff members to click and join the thread. Find out more on the official Tickets Thread Mode documentation page.
Tickets

- Transcripts channel: Transcripts are automatically recorded, encrypted, and stored in cloud storage when tickets are closed. A message will be sent to your transcripts channel to notify you the ticket was closed and provide you with a link to view the archive.
- Overflow category: Discord limits each channel category to 50 channels. When you reach this limit, the Tickets bot can't open more ticket channels. Create an overflow category for additional channels.
- Store ticket transcripts: If you want a written record of your tickets saved, you can enable this option.
- Hide claim button: Tickets can be claimed by a staff member to prevent multiple replies. This reduces clutter and allows for more focused communication. Admins can also claim tickets to address sensitive issues without involving the support team. Enables or disables this option.
/Open Command

- Disable /open command: The /open command allows users to open a new ticket. If you don't want to use this method to open tickets, you can disable it and opt for a ticket button instead.
- Channel category: The channel category to create tickets within.
- Welcome message: The welcome message is displayed in the ticket upon opening. There is a max limit of 1024 characters due to Discord restrictions. Utilize Tickets placeholders and Discord message formatting for links, emojis, roles, or usernames.
Context Menu

You can start a new ticket using message context menus, similar to Discord private threads. Right-click a message or long press on mobile, hover over Apps, then select Start Ticket. A new ticket will be created with the user who sent the message.

- Required permission level: Specifies who can use the right-click menu to create a ticket.
- Add message sender to ticket: To maintain anonymity, don't add the reported person to the ticket if you're using this functionality for message reporting.
- Use settings from panel: By default, context menu tickets use /open command settings. To use a specific reaction panel's settings (e.g., for Mention On Open), select the panel from the dropdown.
Claiming

Tickets can be claimed by a staff member, so other staff members cannot reply. This reduces clutter and prevents sensitive issues from being seen. Claiming can be configured in 3 ways: all staff members can see the ticket, but only the claimer can reply (default), all staff members can see and reply, or only the claimer can see.
Auto Close

You can save yourself a bit of time by having tickets close automatically when the user leaves. If you have Tickets Premium, you can have the ticket close after a certain amount of time has passed since the last message, or time open since the last response.
Ticket Permissions

Choose the permissions given to the users who create the ticket in the ticket channel.
Color Scheme

If you have Tickets Premium, you can change the embed colors the bot uses here.
This covers everything on the settings page. You've done a lot of good work to customize the bot! Next, we'll cover reaction panels.
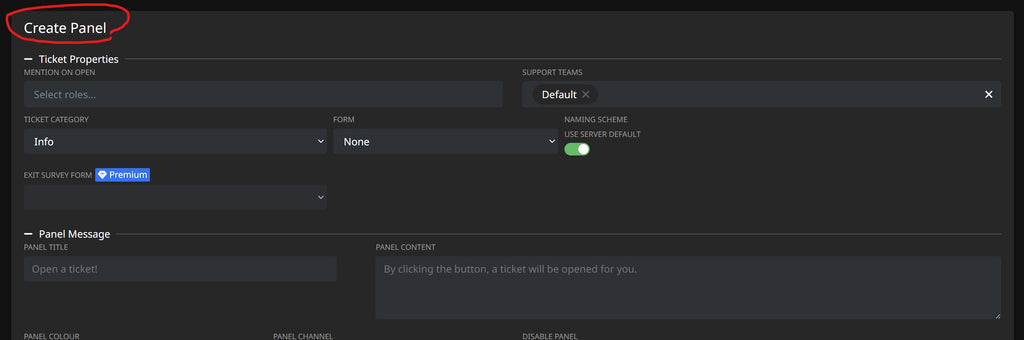
Reaction Panels
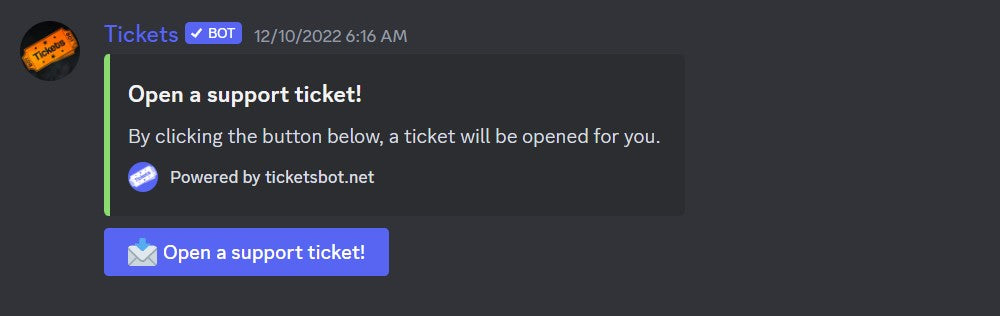
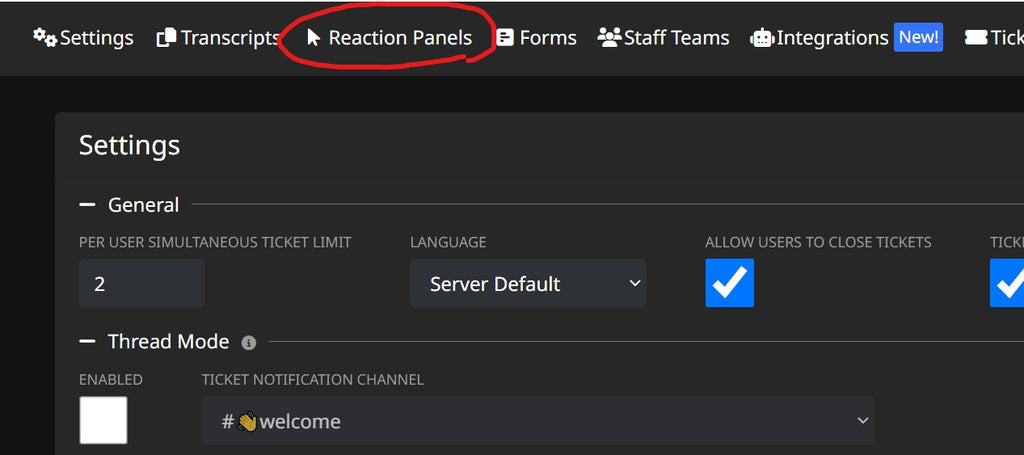
Reaction panels are embeds that users can react to in order to open a ticket with a single click. To create a reaction panel, go to the web dashboard, select your server, and choose Reaction Panels from the top navigation.
From the Reaction Panels page, fill out the following form. It is largely self-explanatory, but if you are confused about anything on this page, you can check the official documentation on reaction panels. Once you've created the panel, you can choose a channel in your server to place the panel.
Support Staff
Tickets bot needs to know which staff members should have access to the tickets (and the online dashboard settings). There are two scenarios for setting up support staff: handling all tickets or handling specific tickets.
Staff Handles All Tickets
The developers recommend using slash commands for this setting.
Adding the specified user to the Default Team in Staff Teams grants them full administrative privileges of the Tickets bot. Admin privileges allow full control and customization of the bot's web dashboard and access to all tickets and transcripts. Only grant this privilege to trusted users.
Commands: /addadmin @username or /addadmin @role
Add the specified user to the Default Team in Staff Teams. They can only see tickets assigned to the Default Team as support.
Commands: /addsupport @username or /addsupport @role
Staff Handles Specific Tickets
Setting specific tickets can only be done on the web dashboard. You can use staff teams to take advantage of this advanced feature.
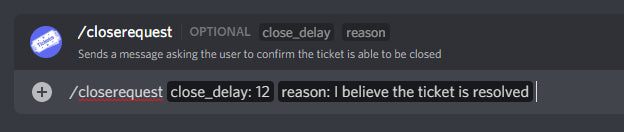
Close Requests
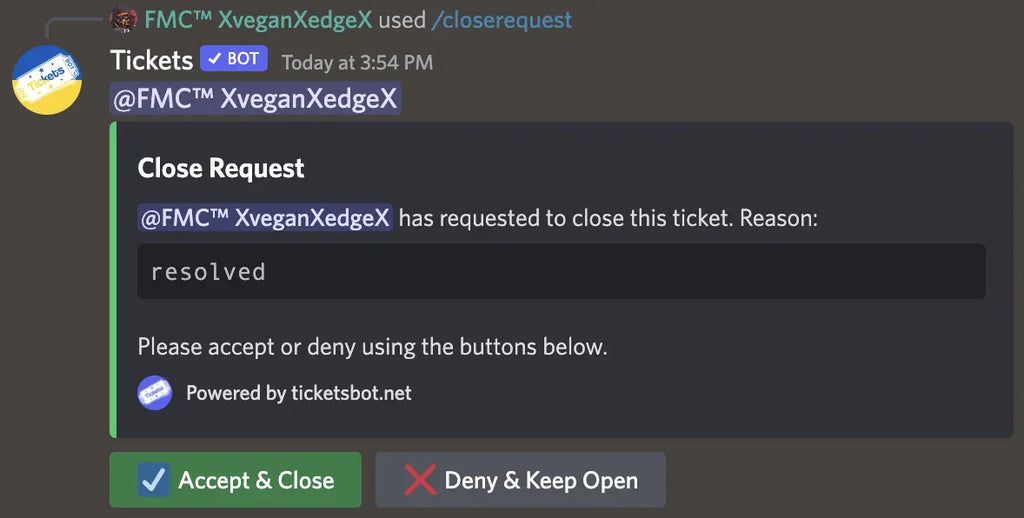
Tickets has a unique "close request" feature. Use the /closerequest command when you're ready to close a ticket and ask the user for confirmation that they feel everything is resolved. Also, you can specify a time (in hours) for automatic closure of tickets if the user does not respond, along with a reason for closure.
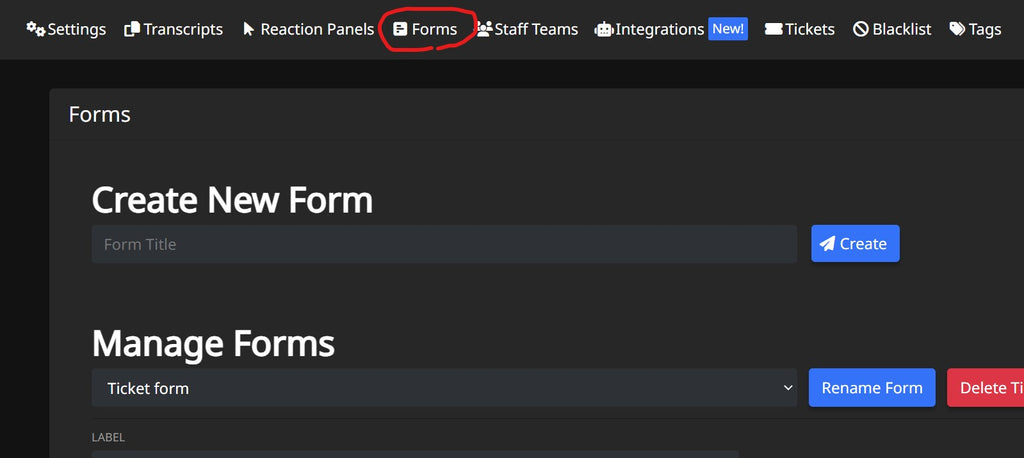
Forms
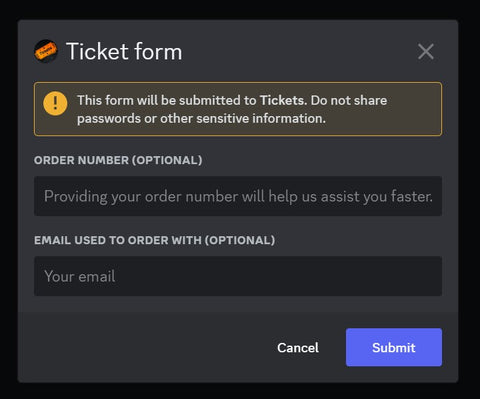
If you need to collect more information from your users before they create the ticket, Tickets has a handy form feature that works great for this purpose. To create a form, go to the "Forms" page in the dashboard.
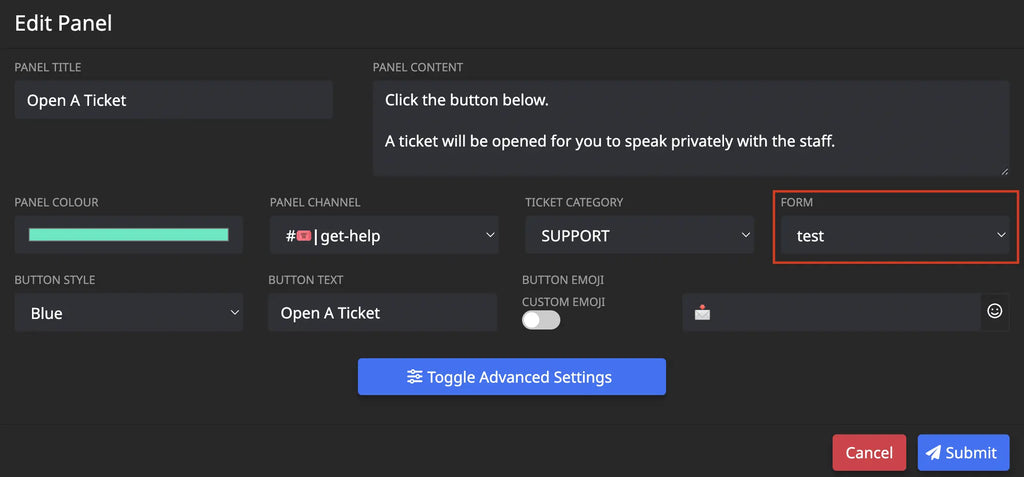
Once you've created a form, you can add it to your reaction panel. Go back to the Reaction Panels page and edit the panel. Choose your form from the "Form" dropdown menu and save.
Tags
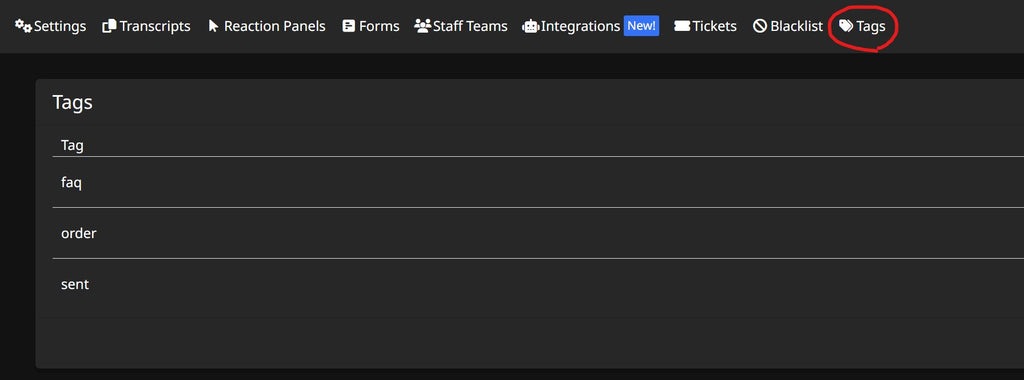
Tags are pre-defined text snippets for quick responses to common questions or concerns. This can make providing assistance easier for you and your support staff. Once you've created a tag, you can give it a name like "help". Then, on Discord use the command /tag help to automatically send this saved bit of text.
Conclusion
You've now configured almost all of the main settings of the Tickets bot. Your server should now have a high-quality tickets system enabled. If you want to dive deep into more advanced features of the bot, you can view all of their official documentation. I hope this guide has been helpful for you to set up tickets in your Discord server!