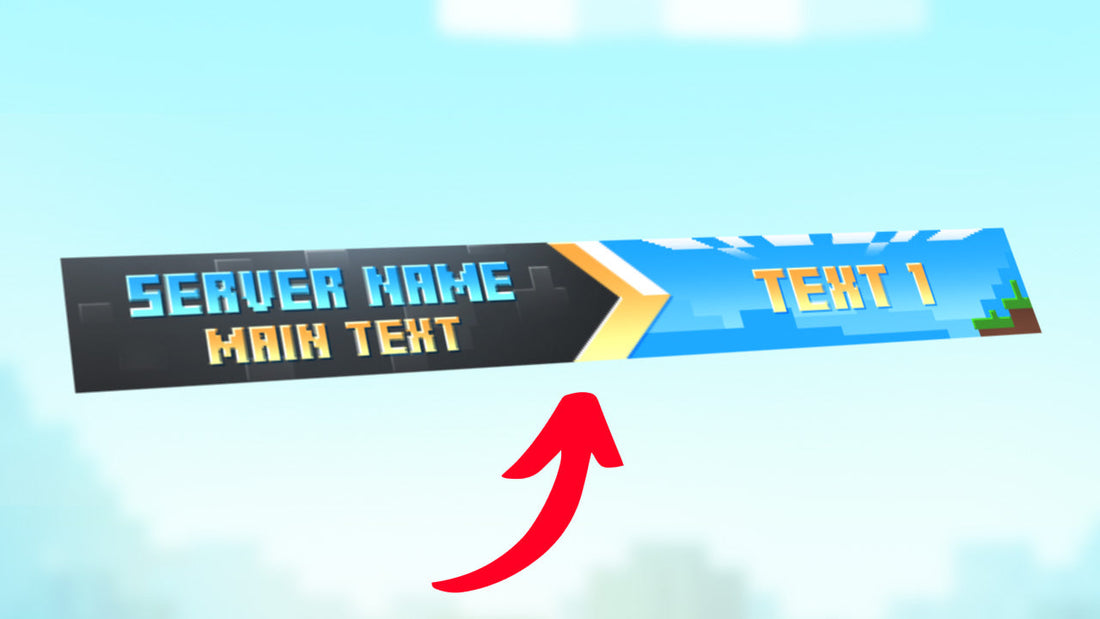
How to Make a Custom Minecraft Server Banner

The banner your Minecraft server uses on server list websites is one of the most important parts of advertising and attracting new players. A high-quality animated banner is essential to make your server stand out. In this guide, we'll cover everything you need to know to create an awesome Minecraft server banner using Photoshop, as well as some information about advanced animated banners created with Adobe After Effects. We'll also provide a free server banner template for you to use and follow along with the tutorial!
Download the Server Banner Template
If you'd like to follow along, we've created a free server banner template that we'll be using in this tutorial. The banner size is 468 × 60 pixels, which is the standard size most server list websites use. The banner uses a free font called Minecraftory.
Creating Animation in Photoshop
Now that we have the banner template, let's open it in Photoshop and start animating it.
-
After opening the banner template, open the "Timeline" window in Photoshop by clicking Window > Timeline in the top menu.

Open the Timeline window to begin animating. -
Create a video timeline by clicking the "Create Video Timeline" button in the center of the Timeline window. If the button says "Create Frame Animation," you need to click the small arrow next to the button, then select "Create Video Timeline" from the dropdown menu.

Ensure you are creating a video timeline, not a frame animation. -
Click the button at the top right of the Timeline window. In the menu that pops up, select "Set Timeline Frame Rate..." and type "20" for the frame rate. This is an ideal frame rate to keep GIF file sizes small while still animating smoothly.

Set the timeline frame rate to 20 fps. -
Click the gear icon in the Timeline window, then set the "Resolution" to 100%. Also, make sure the "Loop Playback" box is checked. This will allow us to preview the animation properly.
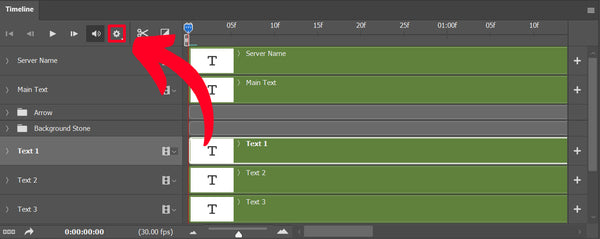
Set resolution to 100% and enable looping. -
In the Timeline window, click the arrow next to the "Text 1" layer to expand its properties. Then, click and drag the playhead to the start of the animation at 0 seconds. The playhead is the blue handle that controls which part of the animation is being previewed. You can see the current time in the bottom left, as shown in the image below.

Expand the layer properties to see animatable options. 
Drag the playhead to the start of the animation. -
Next, we're going to make the text animate by creating keyframes. To create the first keyframe, click the stopwatch icon next to "Transform". This will create the first keyframe. Then, move the playhead to 0:00:00:05 and click the diamond icon next to the stopwatch to create the second keyframe. We've now created two keyframes that we can create animation between.

Click the stopwatch to enable keyframing for the Transform property. 
We've now created two keyframes to animate between. -
Press Ctrl + T. In the top menu, find the box that says "X:", click the text, move your cursor to the right of "px", and type "+300". This will move the X horizontal position of the "Text 1" layer 300 pixels to the right.

Find the X-position property in the top bar. 
Modify the X-position to move the layer horizontally. -
Select the checkmark to apply the transformation.

Click the checkmark to confirm. -
Optionally, you can now press the play button to preview the animation. The "Text 1" layer should slide out from the left side of the screen. Press the stop button to stop the preview, or press the spacebar.

Preview the animation at any time. -
Next, move the playhead to 0:00:01:00 and click the diamond icon to the left of "Transform" to create a keyframe. You should now have three keyframes on the Text 1 layer.
-
Move the playhead to 0:00:01:05 and click the diamond icon next to "Transform" again. You should now have four keyframes on the Text 1 layer.

The four keyframes control the text sliding in and out. -
With the playhead on the fourth keyframe, press Ctrl + T again. In the top menu, find the box that says "X:", click the text, move your cursor to the right of "px", and type "+300". This will once again move the X horizontal position of the "Text 1" layer 300 pixels to the right, allowing it to slide off the banner. You can preview the animation if you would like to see how it looks.
-
Expand the properties of the "Text 2", "Text 3", and "Text 4" layers by clicking the arrows shown below. This will allow us to start animating the remaining three texts.

Expand all text layers to see their properties. -
We'll need to create four keyframes on each of the remaining text layers, similar to what we did with the "Text 1" layer. Starting with "Text 2", create "Transform" keyframes at these times: 0:00:01:00, 0:00:01:05, 0:00:02:00, and 0:00:02:05. Create the first keyframe by clicking the stopwatch icon next to the "Transform" text. Create subsequent keyframes by clicking the diamond icon to the left of the stopwatch. The keyframes should look like this:

The keyframes for "Text 2" are staggered after "Text 1". -
Select the "Text 3" layer, then create "Transform" keyframes at these times: 0:00:02:00, 0:00:02:05, 0:00:03:00, and 0:00:03:05.
-
Select the "Text 4" layer, then create "Transform" keyframes at these times: 0:00:03:00, 0:00:03:05, 0:00:04:00, and 0:00:04:05.
-
We've now added placeholder keyframes for all four texts. Your keyframes should look like this:

Your timeline should now have staggered keyframes for all text layers. -
Next, we'll animate the "Text 2" layer. Select the "Text 2" layer, then move the playhead over the second keyframe of the "Text 2" layer, as shown in the image below.

Position the playhead on the second keyframe. -
With the playhead on the keyframe, make sure the "Text 2" layer is selected, then press Ctrl + T once again. In the top menu, find the box that says "X:", click the text, move your cursor to the right of "px", and type "+300" after it.
-
Click the checkmark to apply the transformation.
Apply the transformation. -
Move the playhead to the fourth keyframe of the layer and repeat steps 19 and 20 again, keeping the playhead over the fourth keyframe.

Repeat the transformation on the last keyframe. -
Repeat the same process with the "Text 3" and "Text 4" layers.
-
All four texts should now slide in and slide out of the banner. We're almost done!
-
If you preview the animation, you should now see all four texts slide in and out of the banner. You'll notice the animation doesn't loop seamlessly yet. We'll fix that with a few simple steps.
-
Click and drag the handle at the end of the animation to 4:00. This handle controls how long the animation is.

Set the total animation duration to 4 seconds. -
Click the "Text 4" layer and move the playhead to 0 seconds. Then, click the diamond icon next to the "Transform" property of the "Text 4" layer.

Add a keyframe to the 'Text 4' layer at 0s. -
Press Ctrl + T. Click in the "X:" box in the top menu, erase the text in the box, then type "360". Click the checkmark button to accept the transformation.
-
Move the playhead to 0:00:00:05 seconds. Then, click the diamond icon next to the "Transform" property of the "Text 4" layer to create another keyframe.
-
Press Ctrl + T. Click in the "X:" box in the top menu, erase the text in the box, then type "660". Click the checkmark button to accept the transformation.
-
Right-click the second keyframe, then select "Hold Interpolation" from the menu.

Using Hold Interpolation prevents unwanted movement between these keyframes. -
If you play the animation, it should now loop seamlessly! Smooth!
-
Optionally, you can make the animation smoother by increasing the frame rate. Click the button at the top right of the Timeline window. In the menu that pops up, select "Set Timeline Frame Rate..." and type "30" for the frame rate. This will make the animation appear smoother, but the file size will be a bit larger.
You can increase the frame rate for a smoother animation. -
Now, you can click on each text layer and type in your own custom text using the Horizontal Text Tool (T) to personalize the banner to your liking!

Add your server's name and information to the banner.
If you ran into any issues following the tutorial, you can download the completed server banner file below.
Render the Banner as a GIF File
Now that we've created the animation and added custom text, we'll need to export the server banner as an animated GIF that server list websites will accept.
-
Click File > Export > Save for Web (Legacy). If you use an older version of Photoshop it may be found under File > Save for Web.
-
In the "Save for Web" window, apply these settings for minimal GIF compression:

Use these settings for minimal GIF compression. -
Click "Save" and choose a location to save the GIF file to.
-
Make sure to save your Photoshop file so you can make edits to your banner in the future. Click File > Save As... and make sure to save as a Photoshop PSD file.
Congratulations! You have now created an awesome, personalized GIF server banner that you can use on server list websites. We hope this tutorial has taught you everything you need to know about how to make a server banner.
Advanced Server Banners and Templates

Some servers use banners with more advanced effects and 3D animation. Using another Adobe program called After Effects, you can create all kinds of eye-catching animated effects. Creating animations in After Effects is more complicated, but Adobe offers a useful beginner tutorial series on their website if you're interested in learning. It's a great starting point for creating your own advanced server banners. If you're looking for a top-quality animated banner and need it quickly, be sure to check out our server banner maker!